
↓ メインコンテンツへスキップ

ePaper とラズパイを使って天気予報ステーションを作ろう!

·2955 文字·6 分
わて
著者
わて

この記事では、ePaper に天気予報が表示される仕組みを作る方法を紹介します。

天気予報は自分の住んでいる地域に個別で設定ができます。
また、コードもそのまま貼ってるので、ほぼコピペで動かせると思います。

ただし、天気予報の精度はそこまで高くないので、その辺はご了承ください。

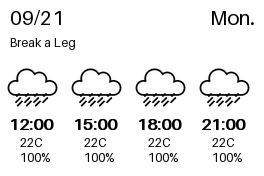
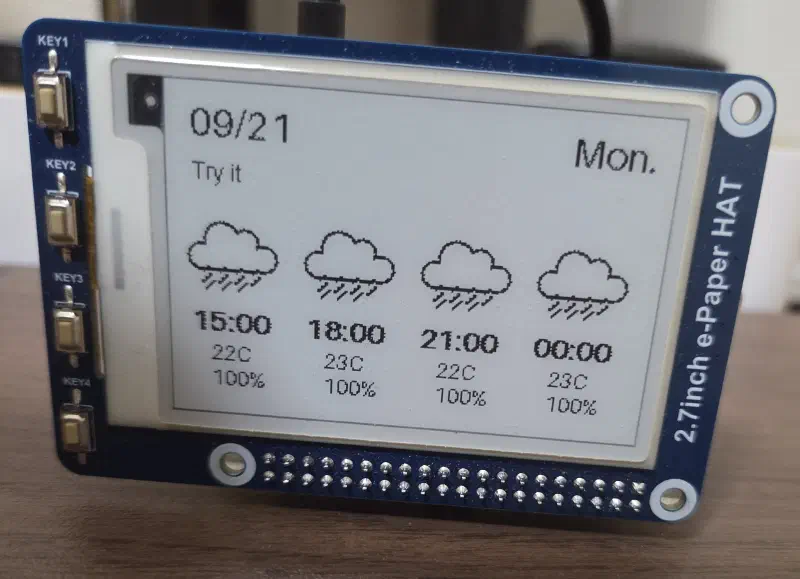
この記事で作る天気予報の表示はこんな感じです。
天気予報に加え、日付と曜日、一言コメントが表示されます。
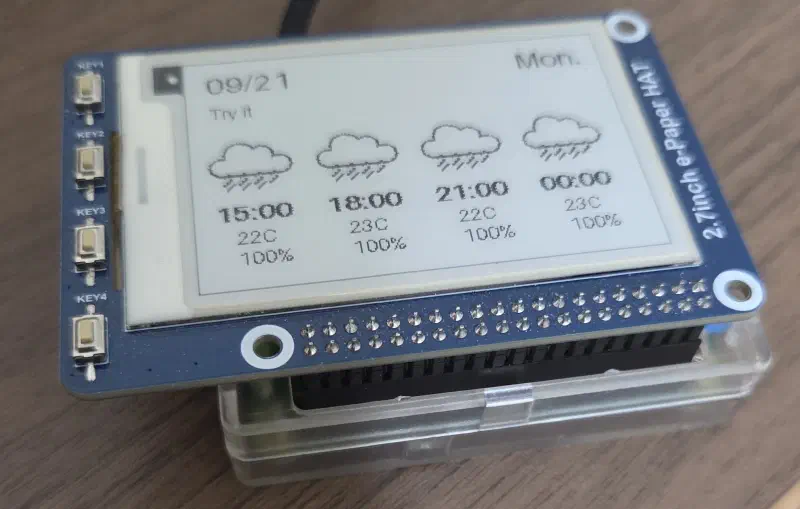
assembling

ePaper にはこのような写真が表示されます↓

output

台風直撃で雨模様ばかりですが、、、

用意するもの
#

その他、ラズパイのためのSDカード、電源ケーブル、Wi-Fi 環境が必要です。

準備ができたら早速作って行きましょう!

ハードウェア設定
#

まずはハードウェアの設定をします。
具体的にはOS のインストール、ネットワークとSPIインターフェースの設定
を行います。

ラズパイにePaper を設置
#

ラズパイの40ピンを使ってePaper を接続させます。

またケースに入れると、基盤守る&スダンドになるのでおすすめです。
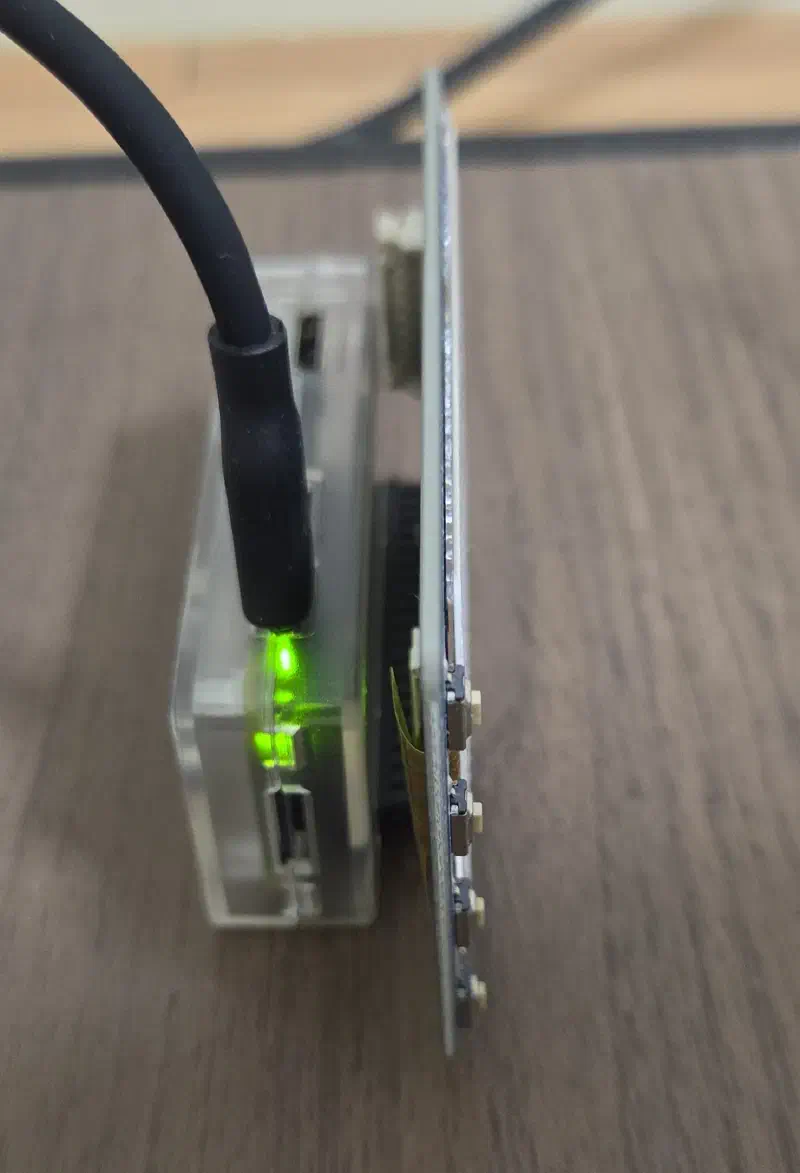
case

OS のインストールとIP 固定
#

今回はePaper に映し出すため専用なので、デスクトップ環境は不要で、Raspberry Pi OS Lite (32-bit) を入れました。

OSを入れるときはラズパイイメージャーを使って、sshも有効にしておきます。このOS は「Raspberry Pi OS (Other)」から選べます。
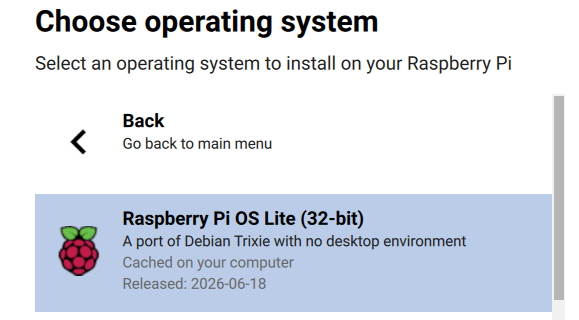
OSイメージ

起動や再起動には5~10分かかります。
起動後はIP を固定しておくと今後便利です。

IP固定 nmtui
sudo nmtui
↓
wlan0を選択(Wi-Fiじゃない場合は使ってるネットワークを選ぶ)
↓
IPv4 CONFIGURATION の項目が <Automatic> になっているので<Manual>へ
↓
固定したいIPとルーターのIPアドレスを設定
↓
完了したら最初の画面のQuitを押下
↓
再起動

SPI を有効にする
#

ePaperの制御にはSPIインターフェースの有効化が必須なので、有効化します。

sudo raspi-config を実行
↓
Interface Options → I4 SPI をYes に
↓
reboot

再起動後、ls /dev/spidev0.* で /dev/spidev0.0や /dev/spidev0.1が見れればOKです。

開発準備
#

色々インストールするのですが、まずは天気予報ステーションのためのディレクトリを作り、移動し、そこで作業を進めます。

mkdir weather_station
cd weather_station

ePaper に表示したい天気予報の写真を以下からダウンロードするか、自作します。
用意する写真は以下の通りです。

cloudy.jpg      rainy.jpg        snow.jpg   thunder.jpg
cloudy_sun.jpg  rainy_sunny.jpg  sunny.jpg  unknown.jpg
写真素材をダウンロード (.tar.gz)

依存パッケージとライブラリ、ドライバの導入
#

つづいてPython の依存パッケージとライブラリを入れます。
今回、ePaper に映す写真の生成にはPillow を用いました。

sudo apt update
sudo apt install -y python3-pil python3-requests python3-spidev python3-rpi.gpio git

さらに、Waveshare ドライバを配置します。

Github からクローンするとe-Paperというディレクトリができてるはずです。ただし、e-Paper/RaspberryPi_JetsonNano/python/lib/waveshare_epd というディレクトリのみ必要なので、同ディレクトリを作業用のディレクトリにコピペしたあとは消しても大丈夫です。(大丈夫じゃなかったらまたクローンしてください笑)

git clone https://github.com/waveshare/e-Paper.git
cp -r e-Paper/RaspberryPi_JetsonNano/python/lib/waveshare_epd .
rm -rf e-Paper

weather_station は以下のような構造になると思います。
あとはPython スクリプトを書いていきます。

weather_station/
|-- images
|   +-- weather
|       |-- cloudy.jpg
|       |-- cloudy_sun.jpg
|       |-- rainy.jpg
|       |-- rainy_sunny.jpg
|       |-- snow.jpg
|       |-- sunny.jpg
|       |-- thunder.jpg
|       +-- unknown.jpg
|-- main.py       # <-- 後で作る
+-- waveshare_epd
    |-- xxx
    |-- xxx

Open Weather API でキーと緯度・経度の取得
#

API キーの取得
#

Python スクリプトを書きたいところなのですが、API キーがないとなにもできないので、OpenWeather のサイトからAPI キーを取得していきます。

とはいえ、既に説明をしてくれてる記事があるので、それを参考にしてもらえればと思います。

緯度・経度を知る方法
#

これらは意外と簡単に取得できて、Google Map を開いて、設定したい場所(最寄りの駅とかが良いかも)を検索します。

そうするとURLが変わり、「@」から「,」までがそれぞれ緯度・経度の順で表記されています。

https://www.google.co.jp/maps/place/%E6%9D%B1%E4%BA%AC%E9%A7%85/@35.68098,139.7644821,17z/data=!3m1!4b1!4m6!3m5!1s0x60188bfbee1467bb:0x410f8b6e7e3ee34f!8m2!3d35.68098!4d139.767057!16s%2Fg%2F11c1t9zp11?entry=ttu&g_ep=EgoyMDI2MDkxNi4wIKXMDSoASAFQAw%3D%3D

Python スクリプトの作成
#

スクリプトは以下のようにしました。コメントアウトされたここを変更と書かれたところを自身のAPI キーや緯度経度に直すことで動作します。

このスクリプトでは3時間毎で12時間分の天気予報が表示されます。
仕組みは、まず、Weather API で天気予報を取得し、気温、降水確率、天気に応じたアイコンを表示します。
※このとき、「曇のち晴れ」と「晴れのち曇」は同じようにアイコンで表記されます。あしからず、

このスクリプトのこだわりは、写真はメモリにのみ展開され、SD カードには書込みを行わないことです。SD カードは耐久性に不安があるのでなるべく書込みをしたくないです。なので、メモリにのみ写真は展開されます。

main.py
  1
  2
  3
  4
  5
  6
  7
  8
  9
 10
 11
 12
 13
 14
 15
 16
 17
 18
 19
 20
 21
 22
 23
 24
 25
 26
 27
 28
 29
 30
 31
 32
 33
 34
 35
 36
 37
 38
 39
 40
 41
 42
 43
 44
 45
 46
 47
 48
 49
 50
 51
 52
 53
 54
 55
 56
 57
 58
 59
 60
 61
 62
 63
 64
 65
 66
 67
 68
 69
 70
 71
 72
 73
 74
 75
 76
 77
 78
 79
 80
 81
 82
 83
 84
 85
 86
 87
 88
 89
 90
 91
 92
 93
 94
 95
 96
 97
 98
 99
100
101
102
103
104
105
106
107
108
109
110
111
112
113
114
115
116
117
118
119
120
121
122
123
124
125
126
127
128
129
130
131
132
133
134
135
136
137
138
139
140
141
142
143
144
145
146
147
148
from PIL import Image, ImageDraw, ImageFont
from datetime import datetime
from pathlib import Path
import random
import requests
import json
from datetime import datetime
import math
from waveshare_epd import epd2in7_V2
import time

BASE_DIR = Path(__file__).resolve().parent

WIDTH = 264
HEIGHT = 176
color = (100, 150, 200)

image = Image.new("L", (WIDTH, HEIGHT), color=255)
draw = ImageDraw.Draw(image)

try:
    font_large = ImageFont.truetype("meiryo.ttc", 20)
    font_medium = ImageFont.truetype("meiryo.ttc", 17)
    font_small = ImageFont.truetype("meiryo.ttc", 12)
except IOError:
    font_large = ImageFont.load_default(size=20)
    font_medium = ImageFont.load_default(size=17)
    font_small = ImageFont.load_default(size=12)


# day, date & one phrase
def date_phrase():
    now = datetime.now()
    weekday = ["Mon", "Tue", "Wed", "Thu", "Fri", "Sat", "Sun"]

    date_str = now.strftime('%m') + '/' + now.strftime('%d')
    wd_num = now.weekday()
    timee = now.strftime('%H')
    day_str = weekday[now.weekday()] + "."

    phrases = ["Break a Leg", "Happy", "Do What You Love", "Try it", "Keep on do it"]

    if int(timee) <= 9 and (wd_num == 2 or wd_num == 5):
        one_phrase = "Replace trash bags: Burnable"
    elif int(timee) <= 9 and (wd_num == 0):
        one_phrase = "Replace the trash bag: Plastic"
    else:
        one_phrase = random.choice(phrases)

    draw.text((10, 5), date_str, fill=0, font=font_large)
    draw.text((210, 5), day_str, fill=0, font=font_large)
    draw.text((10, 35), one_phrase, fill=0, font=font_small)

#get weather report
def getWeatherForecast(url):
    # for attempt in range(10):
    try:
        response = requests.get(url)
        forecastData = json.loads(response.text)

        if not ('list' in forecastData):
            print('error')
            return

        displayForecastData = []
        forecastList = forecastData['list'][:4]

        for forecast in forecastList:
            # three hours forecast
            THF = {}
            THF['time'] = datetime.fromtimestamp(forecast['dt']).strftime('%H:00')
            THF['weather'] = forecast['weather'][0]['main']
            THF['temperature'] = forecast['main']['temp']
            THF['pop'] = math.floor(forecast['pop'] * 100)
            displayForecastData.append(THF)

        return displayForecastData
    except (requests.exceptions.RequestException, Exception) as e:
        print(f"Attempt: {attempt + 1}/10 Failure: {e}")
        time.sleep(5)

    print("Networking error")
    return None

# (weather as string, pop as integer) => string
def getWeatherIconName(weather, pop):
    weather_map = {
        "Clear": "sunny.jpg",
        "Clouds": "cloudy.jpg",
        "Rain": "rainy.jpg",
        "Snow": "snow.jpg",
        "Thunderstorm": "thunder.jpg",
    }
    if (weather == 'Rain') and (pop < 50):
        return 'rainy_sunny.jpg'
    if (weather == 'Clouds') and (pop < 35):
        return 'cloudy_sun.jpg'
    else:
        return weather_map.get(weather, "unknown.jpg")

# get weather main
def get_weather():
    LAT = YOUR_LATITUDE   # <-- ここを変更
    LON = YOUR_LONGITUDE  # <-- ここを変更
    openWeather_API_KEY = 'YOUR_API_KEY' # <-- ここを変更

    # OpenWeatherMap's end point
    url = f"https://api.openweathermap.org/data/2.5/forecast?lat={LAT}&lon={LON}&appid={openWeather_API_KEY}&units=metric&lang=ja"
    forecastData = getWeatherForecast(url)

    DISPLAY_START = 60
    WEATHER_ICON_SIZE = 55
    PROPORTIONALITY = 64

    for i in range(4):
        timee: str = forecastData[i]['time']
        temperature: float = round(forecastData[i]['temperature'])
        pop: float = forecastData[i]['pop']
        weather_icon = getWeatherIconName(forecastData[i]['weather'], pop)
        weather_icon = Image.open(f'{BASE_DIR}/images/weather/{weather_icon}').resize((WEATHER_ICON_SIZE, WEATHER_ICON_SIZE),Image.Resampling.LANCZOS)

        image.paste(weather_icon, (5 + PROPORTIONALITY * i, DISPLAY_START))
        draw.text((9 + PROPORTIONALITY * i, DISPLAY_START + 53), timee, 'black', font=font_medium)
        draw.text((10 + PROPORTIONALITY * i, DISPLAY_START + 53), timee, 'black', font=font_medium)
        draw.text((20 + PROPORTIONALITY * i, DISPLAY_START + 75), f'{temperature}C', 'black', font=font_small)
        draw.text((20 + PROPORTIONALITY * i, DISPLAY_START + 90), f'{pop}%', 'black', font=font_small)

# display
def display():
    try:
        # init e-Paper
        epd = epd2in7_V2.EPD()
        epd.init()
        epd.Clear()

        # display
        epd.display(epd.getbuffer(image))
        time.sleep(5)
        epd.sleep()

    except Exception as e:
        print(e)

if __name__ == "__main__":
    date_phrase()
    get_weather()
    # image.save(BASE_DIR/"output.png")
    display()

一言コメントはphrasesの中身から毎回ランダムで選ばれた言葉が表示されます。好きな言葉を入れてください。
また、特定の曜日の午前中は、燃えるごみ交換、とかそういうコメントが出るようにしてます。ここもご自身のルーティンに変えてください。

crontab 設定
#

このスクリプトは定期的に繰り返したいのでcrontab -eから以下のように6時から21時まで3時間ごとに動作するようにしました。

本当は6-21/3と表記しても同じなのですが、なんかうまく動かなかったので以下のように書きました。

再起動後にも正常動作しているかの確認として動作させるようにしていますが、OS 起動後、プログラムが実行するまでにWi-Fi の立ち上がってなかったりするから、再起動後は3分後くらい待ってから動作させます。

0 6,9,12,15,18,21 * * * /usr/bin/python3 /home/user/weather_station/main.py

@reboot sleep 180 && /usr/bin/python3 /home/user/weather_station/main.py

動作したら完成です。やったね
built